Contents
- What is Rockwell hardness?
- Rockwell hardness test experiment
- Advantages
- Disadvantages
- Difference between Rockwell and Brinell hardness
Frequently asked doubts
- What is Rockwell hardness test?
- How to test hardness?
- what does Rockwell hardness number mean?
Introduction
What is Rockwell hardness?
Before that here is the definition of the term which we will use throughout this post.
Hardness
(noun)
The Rockwell hardness is nothing but value for a particular material obtained using a Rockwell hardness tester.
Hardness
(noun)
- The quality or condition of being hard.
- It is a measure of the resistance to localized plastic deformation.
- Altering interstitial atoms and the density of dislocations control it.
This value is denoted as 'HR'. The notation 'HR' is read as hardness according to Rockwell.
Hugh M invented this process. Rockwell and Stanley P. Rockwell. Prior to the invention, there exist some machines but there was a need for a non-destructive method.
Non-destructive method
- Denoted by NDT(Non-Destructive Testing)
- It is a technique to inspect and test a sample without any damage so that it can be used for the further process if found OK.
Rockwell hardness test experiment
The Rockwell hardness test is,
- A technique used to calculate the hardness of a material.
- A way to find out HRC value.
- It is a differential depth procedure.
The principle theory is important.
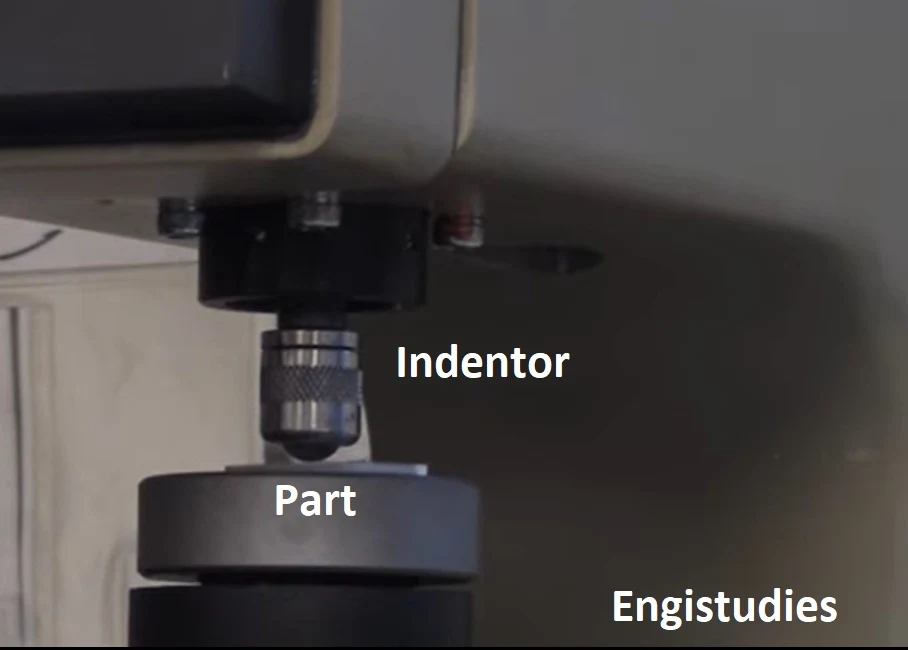
- Keep the part below the diamond indenter at a specified space on the machine.
- Apply a minor load (approx 3kgf) to the object. Hold the indenter in this position for a predetermined time. Set the scale which follows the movement of the indenter to the datum position.
- Measure the depth of indentation from the reading on the scale.
- Now, increase the load up to the major load (approx 150kgf).
- After a specific dwell time, again note down the reading on the scale.
- Release the load slowly and again bring it to the minor load value.
- Similar to step 1, keep the load for some time and note the depth value.
- Release the load fully now.
Read: All About Electrical Isolator: Electrical Isolation Switch
The scale selection is based on the size, shape, and material of the sample and other important factors that have an effect on the final result.
The dwell time is usually of a few seconds, like 5 seconds, choose from the standard table.
The sample regains elastically after removal of the major load (minor load still acting) and stops at a height 'h'.
The following formula calculates the Rockwell hardness number.
Rockwell hardness value = N - h
Advantages
- It is easier to perform than any other type of test.
- The results are more accurate than in other machines.
- It takes less time -Quick.
- The sample will be usable after the test.
- The machine can test metals as well as some plastics.
Disadvantages
- It is not suitable for thin materials.
- Accuracy is low for softer materials as the test totally depends on the impression of the indenter.
Difference between Rockwell and Brinell hardness
Below is the comparison table for Rockwell hardness vs. Brinell hardness
Rockwell
|
Brinell
|
This is quick and easy to perform.
|
It is time-consuming.
|
The depth is measured.
|
The diameter of the impression is measured.
|
Comparatively small loads are used.
|
Approx 3000kgf loads are used in this method.
|
It is a non-destructive method. The sample can be used after the test as a very small impression is produced.
|
It is a destructive method. The produced impression is bigger than that produced by Rockwell.
|
Material with a coarse surface gives errors.
|
A material with a coarse or rough surface can be tested with accuracy.
|
The hardness value is directly read on the scale.
|
An optical evaluation is required.
|


Thanks for sharing this informative post. It's very helpful. Keep it up!
ReplyDeleteSalt Spray Chamber | Box Compression Tester | Bursting Strength Tester Digital | Digital Tensile Testing Machine Cap 2500KG | Wall Thickness Gauge - MagnaMike 8600 | Testing Instruments | GSM Machine
Nice blog, thanks for sharing Hardness test block
ReplyDeleteHardness Tester Machine
ReplyDeleteFine Manufacturing Industries is the best Brinell Hardness Tester supplier, Manufacturer, Wholesaler in India
ReplyDelete